Homemade Croissants from Scratch: The Ultimate Step-by-Step Guide to Flaky, Buttery Perfection
Homemade croissants from scratch represent the pinnacle of home baking — a glorious achievement that transforms simple ingredients like flour, butter, yeast, and salt into golden, flaky masterpieces. According to a 2024 survey by Bake Magazine, over 67% of home bakers consider laminated pastry the most rewarding skill to master, yet only 12% attempt it more than once. This comprehensive guide demystifies the entire process of making authentic French croissants in your own kitchen. Whether you are a passionate home baker seeking your next challenge or a complete beginner drawn to the allure of warm, buttery croissants fresh from the oven, you will discover every technique, trick, and timeline needed to succeed. From understanding the science behind laminated dough to perfecting the iconic crescent croissant shaping method, this article walks you through each stage with precision and encouragement. Prepare to fill your kitchen with the intoxicating aroma of freshly baked flaky croissants that rival any Parisian boulangerie.
📋 Table of Contents
- What Makes a Perfect Croissant? The Science Behind the Layers
- Essential Ingredients for Homemade Croissants from Scratch
- Equipment and Tools You Will Need
- Step-by-Step Homemade Croissant Recipe
- Mastering the Lamination Process: Butter Block and Dough Folds
- Croissant Shaping Techniques for Beautiful Results
- Proofing and Baking: The Final Critical Stages
- Common Mistakes and How to Avoid Them
- Homemade vs. Bakery Croissants: A Detailed Comparison
- Creative Ways to Enjoy Your Homemade Croissants
- Future Trends in Home Baking and Laminated Pastry
- Frequently Asked Questions About Homemade Croissants
What Makes a Perfect Croissant? The Science Behind the Layers
At its heart, a perfect homemade croissant from scratch is a triumph of physics and chemistry wrapped in butter. The defining characteristic — those distinctive, tissue-thin layers that shatter delicately with each bite — results from a precise technique called lamination. This process involves encasing a solid block of butter (known as the beurrage) within a yeast-leavened dough (the détrempe) and repeatedly folding and rolling the composite to create hundreds of alternating strata of dough and fat.
Why does lamination work? During baking, water trapped within the butter layers rapidly transforms into steam. Since butter contains approximately 15-18% water, each microscopic butter layer generates steam pressure that forcibly separates the dough sheets. Simultaneously, the yeast in the dough produces carbon dioxide, adding further lift. The result? A flaky croissant with a honeycomb interior structure that pastry chefs call the "crump" — a network of irregular, glossy air pockets that signify expert lamination.
💡 Pro Tip: The ideal butter temperature during lamination is between 14°C and 16°C (57°F–61°F). At this range, butter remains pliable enough to roll without cracking yet firm enough to maintain distinct layers. Use an instant-read thermometer to check your butter block before each fold. Cold butter shatters; warm butter absorbs into the dough — both ruin the lamination.
Research published in the Journal of Cereal Science (2023) confirms that croissants with 27 to 32 visible layers achieve the optimal balance of flakiness and tenderness. Traditional French methods prescribe three "turns" of the dough, each tripling the layer count, yielding precisely 27 butter layers — the gold standard for authentic French croissants.
Essential Ingredients for Homemade Croissants from Scratch
The beauty of a homemade croissant recipe lies in its simplicity — just a handful of ingredients transform into something extraordinary. However, quality matters enormously. Every ingredient plays a specific functional role, and substituting or skimping will affect your final result. Here is what you need for approximately 12 to 14 classic croissants:

The Ingredient List
- Bread Flour (500g / 4 cups): Higher protein content (12-13%) develops the gluten network essential for trapping steam and supporting the layered structure. All-purpose flour can work, but bread flour yields superior results for laminated dough.
- European-Style Butter (280g / 10 oz for the butter block): This is non-negotiable. European butter contains 82-84% butterfat compared to the standard 80% in American butter. The lower water content and higher fat percentage mean better plasticity and superior layers in your buttery croissants. Look for brands like Plugrá, Kerrygold, or President.
- Whole Milk (240ml / 1 cup): Adds richness and tenderness to the dough. The milk fats also contribute to a softer crumb and deeper browning during baking.
- Granulated Sugar (50g / ¼ cup): Feeds the yeast, promotes browning through caramelization, and adds a subtle sweetness that balances the rich butter flavor.
- Active Dry Yeast (10g / 2¼ teaspoons): The leavening agent that gives your yeast dough its rise. Instant yeast works equally well — no need to proof it separately if using instant.
- Fine Sea Salt (10g / 1¾ teaspoons): Enhances flavor and regulates yeast activity. Never omit salt; bland homemade pastry is a tragedy.
- Unsalted Butter (55g / 4 tbsp, softened, for the dough): Adds tenderness to the détrempe and helps create a supple, workable dough.
- Egg Wash (1 large egg + 1 tbsp milk): Creates that signature glossy, deep-golden crust on the finished flaky croissants.
Equipment and Tools You Will Need
Before you begin your journey of making homemade croissants from scratch, gather the right tools. While professional bakers use massive dough sheeters, home bakers can achieve outstanding results with basic equipment. Having everything ready before you start — what the French call mise en place — makes the multi-day process smoother and more enjoyable.
Step-by-Step Homemade Croissant Recipe
Making homemade croissants from scratch spans two to three days, but active work time totals only about 2 to 3 hours. The extended resting periods are crucial — they allow gluten to relax, flavors to develop, and the butter to chill properly between turns. Here is the complete timeline for your easy homemade croissant recipe:
Day 1 (Evening) — Prepare the Détrempe and Butter Block
- Make the dough: In the bowl of your stand mixer, combine the bread flour, sugar, salt, and yeast. Add the warm milk (about 32°C / 90°F) and the softened 55g of butter. Mix with the dough hook on low speed for 3-4 minutes until a shaggy dough forms, then increase to medium speed and knead for 6-8 minutes until smooth and elastic. The dough should pass the "windowpane test" — when stretched thin, it forms a translucent membrane without tearing.
- First rise: Shape the dough into a ball, place it in a lightly greased bowl, cover with plastic wrap, and let it rise at room temperature for 1 to 1.5 hours until doubled in size.
- Degas and chill: Punch down the dough gently to release excess gas, reshape into a rectangle roughly 15cm × 20cm (6" × 8"), wrap tightly in plastic wrap, and refrigerate overnight (8-12 hours).
- Prepare the butter block: Place the cold European-style butter between two sheets of parchment paper. Using your rolling pin, pound and flatten the butter into a rectangle approximately 15cm × 15cm (6" × 6"). The butter should be cold but pliable — aim for that 14°C–16°C sweet spot. Wrap and refrigerate alongside the dough.
Day 2 (Morning) — Lamination and Turns
- Encase the butter: On a lightly floured surface, roll the chilled dough into a rectangle roughly 20cm × 40cm (8" × 16"). Place the butter block in the center third of the dough. Fold the top third down over the butter and the bottom third up, like folding a business letter. Pinch the seams and edges to seal completely — no butter should peek through.
- First turn (single fold): Rotate the dough 90 degrees so the sealed seam runs vertically. Roll gently into a long rectangle about 20cm × 60cm (8" × 24"). Perform another letter fold. Wrap and chill for 45-60 minutes.
- Second turn: Repeat step 6 — rotate 90°, roll to the same dimensions, and perform another letter fold. Wrap and chill for another 45-60 minutes.
- Third and final turn: Repeat once more. At this stage, your laminated dough contains 27 distinct butter layers. Wrap tightly and chill for at least 2 hours (or overnight) before shaping.
⚠️ Important Note: If at any point during lamination the butter starts to soften and ooze, stop immediately. Transfer the dough to the refrigerator for 20-30 minutes before continuing. Butter that breaks through the dough layers cannot be repaired, and your croissants will be greasy rather than flaky.
Mastering the Lamination Process: Butter Block and Dough Folds
Laminated dough is the cornerstone of every authentic French croissant recipe. The technique dates back to the 17th century and remains largely unchanged — a testament to its elegant perfection. Understanding the types of folds and their mathematical impact on your homemade croissants from scratch empowers you to troubleshoot and adapt with confidence.
Understanding the Mathematics of Layers
Each "turn" multiplies the number of butter layers exponentially. Starting with a single butter layer encased in dough (3 layers total — dough, butter, dough), here is how the layers multiply:
- After the first letter fold: 3 layers × 3 = 9 layers (3 butter layers)
- After the second letter fold: 9 layers × 3 = 27 layers (9 butter layers)
- After the third letter fold: 27 layers × 3 = 81 layers (27 butter layers)
Professional flaky croissants typically use 27 butter layers (three letter folds), though some bakers prefer a combination of a "book fold" (folding both ends to meet in the middle, then folding in half — multiplying layers by 4) and letter folds to achieve different textures. Three letter folds strike the ideal balance: enough layers for dramatic flakiness without the layers becoming so thin that they merge during baking.
"The croissant is a paradox — humble ingredients elevated through precision and patience. When you master lamination, you do not simply bake; you engineer joy, one butter layer at a time."
— Dominique Ansel, James Beard Award-Winning Pastry Chef
Croissant Shaping Techniques for Beautiful Results
Croissant shaping transforms your meticulously laminated dough into those iconic crescent forms that announce "croissant" before the first bite. While the classic crescent is most recognizable, you can shape your homemade pastry in several appealing ways.

Classic Crescent Croissants
- Roll the chilled laminated dough into a large rectangle 60cm × 30cm (24" × 12") and about 4-5mm thick.
- Using a sharp knife or pizza cutter, trim the edges to create clean, straight sides. Save the scraps — they make delicious mini pastries.
- Along the long edge, mark points every 10cm (4 inches). Along the opposite long edge, start the first mark at 5cm (2 inches), then mark every 10cm. This offset creates the triangles.
- Connect the marks diagonally to form elongated triangles. Each triangle should have a base of approximately 10cm (4") and a height of about 30cm (12").
- Cut a small 1cm (½") slit at the base of each triangle. Gently stretch the triangle lengthwise, then starting from the base, roll tightly toward the tip, curling the ends slightly inward to form the classic crescent.
Alternative Shapes
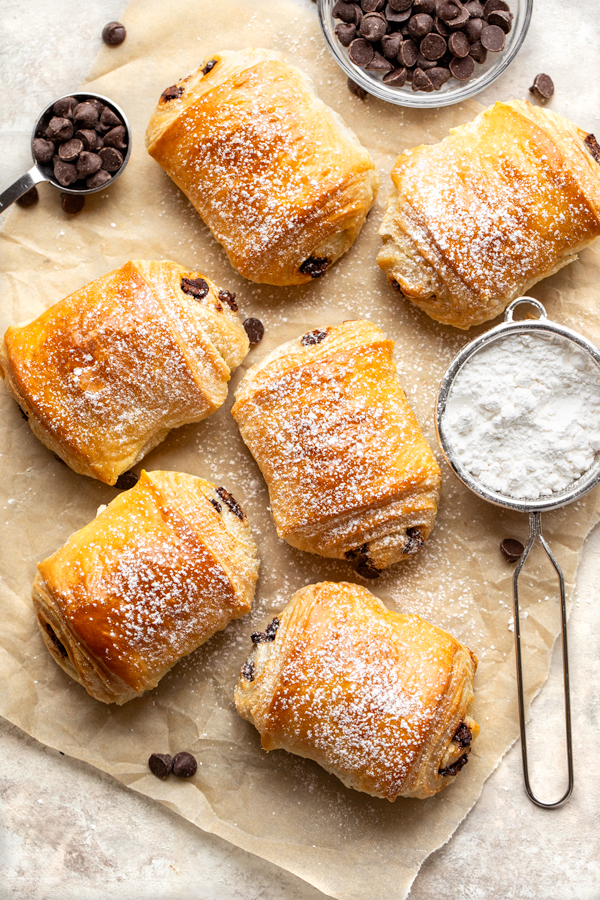
- Pain au Chocolat: Cut the dough into rectangles (10cm × 15cm). Place two batons of dark chocolate at one short end, roll halfway, place two more batons, and finish rolling.
- Pain aux Amandes: Fill classic croissant shapes with almond cream (frangipane) and top with sliced almonds before baking.
- Mini Croissants: Perfect for parties — simply cut smaller triangles (5cm base) and reduce baking time by 3-4 minutes.
Proofing and Baking: The Final Critical Stages
After shaping, your homemade croissants from scratch face their final and most delicate phase. Proofing — the final rise — must be done gently to preserve those precious butter layers. Rushing this stage is the single most common reason home bakers end up with dense, greasy pastries instead of light, flaky croissants.
The Perfect Proof
Arrange your shaped croissants on parchment-lined baking sheets, leaving at least 5cm (2") between each — they will double in size. The ideal proofing environment is 24°C–26°C (75°F–79°F) with moderate humidity. Avoid temperatures above 27°C (80°F); the butter will melt and pool beneath the croissants.
- Proofing time: Approximately 2 to 3 hours, depending on ambient temperature.
- Visual cue: Croissants should be noticeably puffy, almost jiggly when the tray is gently shaken. The layers should be visible and slightly separated.
- Touch test: A gently pressed finger should leave a slight indentation that slowly springs back.
Baking to Golden Perfection
- Preheat: Set your oven to 200°C (400°F) at least 30 minutes before baking. Consistent, intense heat is crucial for the initial "oven spring."
- Egg wash: Just before baking, gently brush each croissant with the egg wash mixture. Be careful not to let egg drip onto the cut sides — this can glue layers together and prevent proper rise. For an extra-glossy finish, apply a second thin coat after the first dries (about 2 minutes).
- Bake: Place the trays in the center of the oven and bake for 15 to 18 minutes, rotating the trays halfway through for even browning. The croissants are done when they are a deep, rich golden-brown — paler croissants may be under-baked in the center.
- Cool: Transfer to a wire rack and let cool for at least 20 minutes before serving. The interior structure continues to set during cooling. Cutting into a croissant too soon releases steam and can create a gummy texture.

Common Mistakes and How to Avoid Them
Even experienced bakers encounter challenges when making homemade croissants from scratch. Recognizing potential pitfalls before you begin saves time, ingredients, and frustration. Here are the most frequent issues and their solutions:
🚨 Common Emergency: Butter breaking through the dough surface during rolling. Solution: Immediately dust the exposed area with flour, fold the dough gently to contain the butter, and refrigerate for 30 minutes. Never continue rolling when butter is visible — it will only worsen.
Homemade vs. Bakery Croissants: A Detailed Comparison
Is investing two to three days in making homemade croissants from scratch truly worth it when excellent bakeries abound? The answer depends on what you value — convenience, cost, quality, or the sheer satisfaction of creation. Here is an honest side-by-side comparison:
The verdict? For everyday convenience, a quality bakery wins. But for special occasions, the joy of serving warm, homemade croissants you crafted entirely by hand is incomparable. Plus, at roughly $0.50 per croissant versus bakery prices averaging $4.50, the savings add up quickly — a batch of 12 saves you approximately $48.
Creative Ways to Enjoy Your Homemade Croissants
Your homemade croissants from scratch are far more versatile than a simple breakfast pastry. Across the global culinary landscape, croissants serve as the foundation for both sweet and savory creations that span cultures and occasions. Here are inspiring ways to showcase your buttery croissants:
Sweet Applications
- Croissant Bread Pudding: Cube day-old croissants, soak in a custard of eggs, cream, vanilla, and cinnamon, then bake until golden. A luxurious dessert that originated in French bistros and now graces tables worldwide.
- Almond Croissants: Fill with frangipane, top with sliced almonds, and dust generously with powdered sugar. Twice-baked to crispy, nutty perfection.
- Croissant French Toast: Slice croissants in half, dip in egg batter, and pan-fry in butter. Serve with maple syrup and fresh berries for an elevated brunch.
- Ice Cream Sandwiches: Split mini croissants, fill with premium vanilla ice cream, and press closed. A sophisticated twist on a summer classic.
Savory Creations
- Gourmet Breakfast Sandwich: Layer scrambled eggs, crispy bacon or smoked salmon, and creamy hollandaise sauce inside a warm croissant. A café-worthy breakfast at home.
- Chicken Salad Croissant: Fill with classic chicken salad studded with grapes and walnuts. Perfect for elegant luncheons and picnics.
- Croissant Panini: Press ham, Gruyère cheese, and Dijon mustard between split croissants and grill until the cheese melts. The flaky exterior contrasts beautifully with the warm, savory filling.
- Mediterranean Croissant: Stuff with hummus, roasted red peppers, arugula, and feta cheese for a vegetarian option bursting with flavor.
Future Trends in Home Baking and Laminated Pastry
The world of homemade pastry is evolving rapidly, driven by technology, sustainability concerns, and shifting consumer preferences. As we look toward the future of baking homemade croissants from scratch, several exciting trends are emerging that will shape how home bakers approach laminated dough in the coming years.
1. Sustainable and Alternative Ingredients
With growing environmental awareness, bakers are experimenting with plant-based butter alternatives specifically formulated for lamination. Brands are developing vegan butter blocks with 80%+ fat content that mimic the plasticity of dairy butter. Additionally, regeneratively farmed flours and heritage grain varieties are gaining popularity, offering complex flavors and reduced environmental impact. By 2028, industry analysts predict that 25% of home bakers will regularly incorporate alternative ingredients into traditional laminated pastry recipes.
2. Smart Kitchen Integration
Smart ovens with precise humidity control and integrated temperature probes are making proofing croissants more foolproof than ever. These appliances can maintain the exact 24°C–26°C proofing environment automatically, removing the guesswork. Companion apps guide bakers through each stage with timed reminders and video demonstrations, effectively bringing professional pastry school into the home kitchen.
3. Global Flavor Fusion
Traditional French croissants are embracing global flavors. Matcha-laminated dough from Japan, saffron and cardamom-infused variations from the Middle East, and ube-filled croissants from the Philippines represent a creative wave of fusion croissants. This trend aligns with the broader Vision 2030 cultural exchange initiatives seen in nations like Saudi Arabia, where international culinary techniques merge with local flavor profiles to create innovative, globally inspired pastries.
4. Online Baking Communities and AI Guidance
Social platforms dedicated to baking croissants have exploded, with communities on Reddit, Instagram, and specialized forums sharing triumphs and troubleshooting in real time. AI-powered baking assistants can now analyze photos of your dough to assess lamination quality and suggest adjustments — a development that democratizes expert knowledge for beginner croissant bakers worldwide.
💡 Sustainability Tip: Reduce food waste by repurposing croissant scraps and imperfect shapes. Toss trimmed dough edges with cinnamon sugar and bake into "croissant crisps" — a delicious snack that uses every last piece. Day-old croissants transform beautifully into bread pudding, croutons for soup, or toasted almond croissants.
Frequently Asked Questions About Homemade Croissants
Q1: How long does it take to make homemade croissants from scratch?
Making homemade croissants from scratch typically spans 2 to 3 days, but active hands-on time is only about 2 to 3 hours total. Day 1 involves preparing the dough and butter block (30 minutes active), followed by overnight chilling. Day 2 requires the lamination process with three turns (about 1.5 hours active, with chilling periods between turns). Day 3 involves shaping, proofing (2-3 hours passive), and baking (18 minutes). Most of the timeline is resting and chilling, which develops flavor and keeps the butter cold.
Q2: Can I freeze homemade croissant dough?
Absolutely! Laminated croissant dough freezes beautifully at two stages. You can freeze the fully laminated dough block (after completing all three turns) wrapped tightly in plastic wrap and then foil for up to 2 months. Thaw overnight in the refrigerator before shaping. Alternatively, freeze fully shaped, unproofed croissants on a baking sheet until solid, then transfer to a freezer bag for up to 3 months. When ready to bake, place frozen croissants on a baking sheet, cover loosely, and proof overnight in the refrigerator (8-10 hours), then bake as directed.
Q3: Why did my croissants come out flat and dense?
Flat, dense homemade croissants almost always result from butter melting into the dough during lamination or proofing. When butter layers disappear into the dough, there is nothing to create steam and separate the layers during baking. Common causes include: (1) dough and butter not cold enough during lamination, (2) room temperature too warm (above 22°C/72°F), (3) overworking the dough causing gluten to tighten and squeeze out butter, and (4) proofing at temperatures above 27°C (80°F). Always chill the dough for 45-60 minutes between turns, use an instant-read thermometer, and proof in a cool environment.
Q4: What is the best butter for homemade croissants?
For authentic French croissants from scratch, European-style butter with 82-84% butterfat content is the gold standard. The higher fat percentage and lower water content (compared to standard American butter at 80% fat) provide superior plasticity — meaning the butter stays flexible when cold and creates cleaner, more distinct layers. Recommended brands include Plugrá, Kerrygold, President, Isigny Sainte-Mère, and Beurre d'Isigny. Avoid margarine or low-fat butter substitutes; they lack the structural integrity needed for successful lamination.
Q5: How do I know when my croissants are properly proofed?
Properly proofed flaky croissants exhibit several clear signs: (1) They have nearly doubled in size and look noticeably puffy, (2) the individual layers are visible and slightly separated at the cut edges, (3) when you gently shake the baking tray, the croissants jiggle like jelly — a sign of a well-aerated, active yeast structure, and (4) a gentle finger press leaves a slight indentation that slowly springs back. Under-proofed croissants will be dense; over-proofed ones may collapse and leak butter during baking.
Q6: Can I make croissants with all-purpose flour instead of bread flour?
Yes, you can make homemade croissants with all-purpose flour, but the results will differ. Bread flour, with its higher protein content (12-13%), develops a stronger gluten network that better supports the laminated structure and traps steam effectively. All-purpose flour (10-11% protein) produces a more tender, slightly less structured croissant. If using all-purpose flour, handle the dough gently to avoid overworking, and consider adding an extra 5-10 minutes of chilling between turns to prevent gluten from becoming too elastic.
Q7: What is the difference between a croissant and puff pastry?
While both are laminated doughs, the key difference is yeast. Croissants use a yeast-leavened dough (détrempe) that ferments and rises, creating a light, airy, bread-like interior with distinct honeycomb structure. Puff pastry (pâte feuilletée) contains no yeast — its rise comes entirely from steam generated by butter layers during baking. Consequently, puff pastry is crisper and more delicate, while croissants are softer, richer, and more substantial. Croissants also contain milk and sugar, adding tenderness and flavor absent in traditional puff pastry.
Q8: How should I store homemade croissants and how long do they last?
Homemade croissants from scratch are best enjoyed fresh on the day they are baked, ideally within 4-6 hours of emerging from the oven. Store leftovers in an airtight container at room temperature for up to 2 days. To refresh, warm in a 175°C (350°F) oven for 5-7 minutes — never microwave, as this creates a tough, chewy texture. For longer storage, freeze fully baked and cooled croissants in freezer bags for up to 1 month. Reheat directly from frozen in a 180°C (350°F) oven for 10-12 minutes until crisp and warm.
Conclusion: Your Journey to Perfect Homemade Croissants Begins Now
Mastering homemade croissants from scratch is more than a baking project — it is a rite of passage that connects you to centuries of pastry tradition. The process demands patience, precision, and a willingness to learn from each attempt. Yet the reward — pulling a tray of golden, flaky croissants from your own oven, their buttery aroma filling your kitchen — justifies every moment of effort. You now possess the knowledge to tackle laminated dough with confidence: the science of those perfect layers, the ingredients that make the difference, the techniques that separate success from frustration, and the creative possibilities that extend far beyond the classic crescent.
Remember that even professional pastry chefs needed dozens of attempts to perfect their authentic French croissant recipe. Your first batch may not look like a magazine cover, and that is perfectly fine. Each fold, each turn, each bake teaches you something new. Embrace the process, trust your instincts, and never hesitate to chill the dough when in doubt. The global community of home bakers is vast and welcoming — share your triumphs, troubleshoot your challenges, and celebrate the joy of creating something extraordinary from the simplest ingredients.
So clear your weekend, stock your refrigerator with premium European butter, and embark on the most rewarding baking adventure your kitchen has ever seen. Your perfect homemade croissants await.
🔥 Ready to Bake Your Best Croissants Ever?
Download our free 3-page laminated dough cheat sheet — complete with a day-by-day timeline, butter temperature chart, and troubleshooting guide. Join 15,000+ home bakers who have already transformed their pastry skills. Enter your email below and start baking with confidence today!
No spam. Unsubscribe anytime. We respect your inbox.
🏷️ Tags
#HomemadeCroissants #CroissantsFromScratch #LaminatedDough #FrenchPastry #ButteryCroissants #HomeBaking #FlakyCroissants #CroissantRecipe #BakingTips #HomemadePastry #YeastDough
📖 You May Also Enjoy:
External Resources: King Arthur Baking — Classic Croissant Recipe | Serious Eats — The Science of Croissants | Bon Appétit — BA's Best Croissants