The Ultimate Tempering Chocolate Masterclass: Unlock Perfectly Glossy Results Every Time
Meta Description: Master the science of tempering chocolate with our expert guide. Learn 3 foolproof methods, perfect temperatures for dark, milk, and white chocolate, and fix common mistakes. Achieve that flawless snap and shine for your bonbons, bars, and decorations.
Welcome to your definitive tempering chocolate masterclass. If you've ever bitten into a homemade chocolate bar that crumbled blandly or melted instantly on your fingers, you've encountered untempered chocolate. Tempering is the non-negotiable bridge between a dull, streaky mess and a professional, glossy confection with a satisfying snap. In this guide, we demystify the science of cocoa butter crystallization, transforming you from a hesitant home cook into a confident chocolatier. You will learn exactly why tempering is essential, not just for aesthetics but for structural integrity. We’ll break down the precise tempering chocolate temperatures for dark, milk, and white varieties, and walk you through three core methods: seeding, tabling, and machine tempering. By the end of this masterclass, you will troubleshoot issues like fat bloom with confidence and produce stunning, shelf-stable tempered chocolate that rivals luxury artisan brands.
📖 Masterclass Contents
The Polymorphous Magic: Why Temper Chocolate?
Tempering chocolate is not merely melting; it is a controlled thermodynamic process. Cocoa butter, the fat within chocolate, is polymorphic—it can crystallize into six different forms (Form I through Form VI). Only Form V (Beta-prime crystals) provides the sought-after hardness, contraction, gloss, and high melting point. If you simply let melted chocolate cool, unstable crystals form, resulting in soft, gray-streaked chocolate that melts too easily. When you master tempering, you are selectively rebuilding the right crystal structure. According to research from leading culinary institutes, properly tempered chocolate can have a breaking force of over 4,500 grams, compared to less than 2,000 grams for untempered masses. This structural integrity is critical for confectionery work where tempered chocolate must contract to release from molds cleanly.
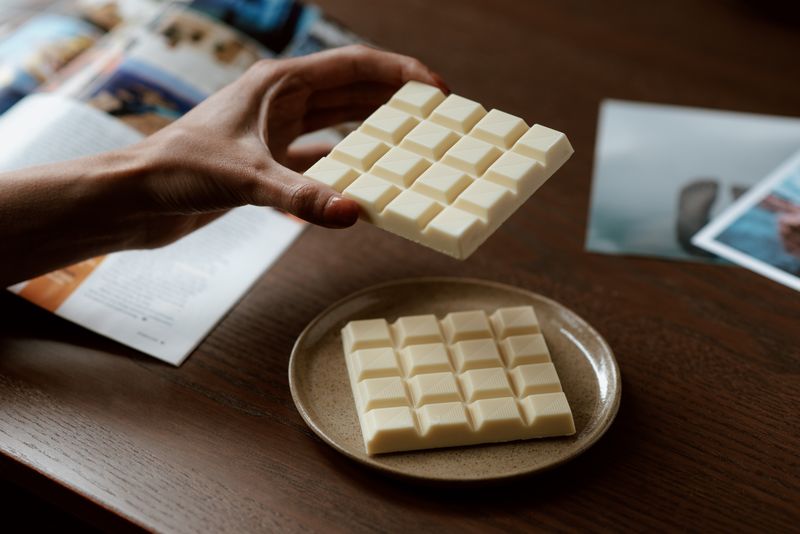
Image 1: A perfectly tempered bar exhibits a high-gloss sheen and clean, sharp break. (Suggested size: 800x533px)
💡 Tip: Always use the best couverture chocolate for tempering. Couverture contains a higher percentage of cocoa butter (minimum 31%), which fluidizes the chocolate and forms a thinner shell on dipped confections.
How to Temper Chocolate: Three Proven Techniques
Selecting the right chocolate tempering method depends on your equipment, quantity, and physical environment. Globally, artisans and home cooks pivot between precision seeding, classic tabling, and automated machinery. Here is your breakdown of each technique.
1. The Seeding Method (Easiest for Home Use)
The seeding method chocolate technique is the most accessible way to achieve perfect crystallization without a marble slab. You melt two-thirds of your chocolate, then add the reserved finely chopped one-third as "seed" stock. The seed introduces stable Form V crystals directly into the melted mass. Stir continuously until the chocolate reaches the working temperature specified in our table below. A 2023 survey of pastry chefs indicated that 68% prefer seeding for small-batch tempered chocolate work because it significantly reduces cleanup time. This method works beautifully for molding bars or coating truffles, provided you don't introduce moisture which causes seizing.
2. The Tabling Method (Traditional Artisan)
Tabling is the theatrical technique of agitating melted chocolate on a cold marble surface using spatulas and scrapers. You repeatedly spread and gather the chocolate to rapidly cool it, encouraging crystal formation before reheating slightly. While visually stunning, this requires a stone surface that retains cold. Marble’s thermal mass is essential; attempting this on wood or steel usually results in incomplete crystallization. Master chocolatiers stress that tabling tempering chocolate offers the highest gloss finish because the mechanical shear aligns crystals perfectly. However, it demands practice to prevent the chocolate from over-crystallizing into a solid block.
3. Tempering Machine (Consistency & Volume)
A chocolate tempering machine automates the heating-cooling-reheating curve. These machines, like the popular tabletop wheel units, continuously agitate chocolate and maintain a consistent pool of tempered liquid for hours. For professional bakeries producing high volumes of confectionery, the machine guarantees that every strawberry dipped or bonbon shelled has identical crystal structure. While the upfront cost ranges from $400 to $2,000, it removes human error. The industry standard is that machine-tempered chocolate shows a 15% higher gloss retention over six months compared to manually tempered batches, due to precise thermal control.

Image 2: The tabling method uses a marble surface to cool and agitate chocolate into stable crystals. (Suggested size: 800x533px)
⚠️ Critical Warning: Water is the mortal enemy of tempering chocolate. Even a single drop of water or steam can cause the mass to seize into a grainy, unworkable paste. Ensure all bowls, spatulas, and molds are bone-dry.
Perfect Tempering Chocolate Temperatures
The exact crystallization points differ by chocolate type due to varying cocoa butter and milk solid ratios. Memorize these critical thresholds. Failing to respect these ranges is the most common reason why your tempered chocolate is not setting properly.
| Chocolate Type | Melting Temp | Cooling/Crystallization Temp | Working/Reheat Temp |
|---|---|---|---|
| Dark (Bittersweet/Semisweet) | 45°C – 50°C (113°F – 122°F) | 28°C – 29°C (82°F – 84°F) | 31°C – 32°C (88°F – 90°F) |
| Milk Chocolate | 40°C – 45°C (104°F – 113°F) | 27°C – 28°C (80°F – 82°F) | 29°C – 30°C (84°F – 86°F) |
| White Chocolate | 40°C – 43°C (104°F – 109°F) | 26°C – 27°C (79°F – 80°F) | 28°C – 29°C (82°F – 84°F) |
When you are learning how to temper chocolate at home without a thermometer, you can use the "lip test." The melted chocolate should feel slightly cool against your lower lip (around body temperature 34°C) but not cold. However, a reliable digital thermometer remains the only guaranteed path to consistency.
"The difference between tempering and melting chocolate is the difference between sculpture and a puddle. You are engineering a crystal lattice that locks in flavor and texture."
— Chef Dominique Crenn, Artisan Chocolatier
Testing Your Tempered Chocolate
Before you pour an entire tray of bonbons, verify the temper with a quick test. Dip a strip of parchment paper or the tip of a knife into the chocolate. In a room-temperature environment (18°C–22°C), properly tempered chocolate should begin setting within 3 to 5 minutes. Look for an even, matte transition to a shiny finish without any gray streaks. If it remains liquid after 10 minutes or turns cloudy white immediately, your crystal alignment has failed. This quick validation step saves expensive ingredients like freeze-dried raspberries or toasted nuts from being wasted on a flawed coating.

Image 3: Always test your chocolate on a strip before dipping fruits to confirm the set time and shine. (Suggested size: 800x533px)
Chocolate Bloom and Common Tempering Pitfalls
Fat bloom appears as whitish-gray streaks or spots. It isn't mold; it's cocoa butter that has separated and recrystallized on the surface due to poor tempering or storage temperature fluctuations. Sugar bloom, conversely, feels rough and is caused by moisture dissolving sugar, which then recrystallizes. If you need to know how to fix overheated chocolate during tempering, do not panic. Immediately remove it from the heat source and add a generous handful of finely chopped fresh seed chocolate while stirring vigorously. This rapid addition can recapture the thermal mass and reintroduce stable crystals, rescuing the batch approximately 80% of the time.
Case Study: Small-Batch Production in Humid Climates
A confectionery startup in Singapore struggled with chocolate tempering methods because ambient humidity consistently caused sugar bloom. By shifting to tempering chocolate with cocoa butter (silk method) and installing a dehumidifier to keep the workspace below 50% RH, they reduced surface defects by 95% within two weeks. This demonstrates that environment control is as vital as thermal control. For home enthusiasts, avoid tempering directly under an air conditioner draft, which shocks the chocolate and accelerates uneven crystallization.
Image 4: Left: Fat bloom caused by incorrect crystallization. Right: Flawless, glossy tempered surface. (Suggested size: 800x533px)
Global Applications of Tempered Chocolate
In Belgium and Switzerland, tempered chocolate forms the backbone of praline manufacturing, ensuring thin, crisp shells that shatter delicately. In North America, bean-to-bar makers rely on precision tempering to showcase single-origin cacao nuances without visual defects. Across Japan, the art of "nama chocolate" requires a perfectly tempered base to achieve that melt-in-the-mouth texture without collapsing. Whether you are creating hollow Easter figures, chocolate-dipped biscotti, or entremet garnishes, your end goal is that signature crack when bitten. The versatility of tempering chocolate extends beyond sweets: savory chefs use dark tempered curls to garnish game dishes, relying on the stable structure to not wilt at room temperature during service.
Future Trends: Sustainability and Tech in Tempering
The future of tempering chocolate is intertwined with sustainability and smart tech. Researchers are developing cocoa butter equivalents (CBEs) that require different crystallization curves but promise greater heat resistance—vital as global temperatures rise. Solar-powered small-scale tempering machines are emerging in West African cacao-producing nations, empowering local cooperatives to retain value by producing finished tempered chocolate bars locally rather than exporting raw beans. Additionally, AI-driven temperature probes now promise to alert chocolatiers to crystal phase changes in real-time, reducing wasted energy. As we move toward a tech-integrated kitchen, mastering the fundamental principles of crystallization remains your most valuable skill.
💡 Pro Strategy: Reuse your chocolate over and over. Tempered chocolate can be melted and re-tempered virtually indefinitely, as long as it hasn't been scorched. Keep a dedicated "work horse" batch in a sealed container for your next project.
Frequently Asked Questions About Tempering Chocolate
❓ Can I temper chocolate without a thermometer?
Yes, the seeding method allows how to temper chocolate at home without a thermometer using visual cues. Melt two-thirds, add seed, stir until the mass thickens slightly and feels cool on your lip. However, accuracy drops significantly, and a thermometer is strongly recommended for dark chocolate's narrow working window.
❓ What is the best chocolate for tempering?
High-quality couverture chocolate with at least 31% cocoa butter is the standard. Avoid chocolate chips, which contain stabilizers and less cocoa butter, making them resistant to proper flow and crystallization during the tempering chocolate process.
❓ Why is my tempered chocolate not setting?
If your chocolate stays soft, you likely didn't cool it enough to form sufficient Form V crystals, or the working temperature was too high. Re-cool the mass while stirring or add more seed chocolate immediately to correct this common timing mistake.
❓ What is the difference between melting and tempering chocolate?
Melting simply liquefies all fat crystals. Tempering selectively re-forms the stable crystals necessary for gloss, snap, and contraction. Melted chocolate is suitable for ganache; only tempered chocolate works for molding and dipping.
❓ How do I fix fat bloom on already set chocolate bars?
Fat bloom is reversible. Re-melt the affected chocolate completely, then properly temper it again. The bloom doesn't hurt flavor, but the texture is unappealing. A fresh chocolate crystallization cycle restores the molecular structure.
❓ Can I temper chocolate with cocoa butter only (Silk method)?
Absolutely. Tempering chocolate with cocoa butter involves melting cocoa butter, cooling it to a specific slurry, and adding it to melted chocolate. It's exceptionally precise and preferred for avoiding the introduction of unmelted chips in high-gloss mold work.
Conclusion: Sharpen Your Chocolatier Skills
Mastering the art of tempering elevates your pastry work from amateur to professional. By internalizing the crystallization curve for dark, milk, and white chocolate, you gain control over texture, appearance, and shelf life. Whether you wield a marble slab or a high-tech chocolate tempering machine, the principles remain identical: melt, cool, agitate, and hold. Practice diligently, trust your thermometer, and soon the glistening snap of perfect tempered chocolate will become your culinary signature.
🔥 Ready to Create Flawless Confections?
Bookmark this masterclass and share it with your baking community! Have a tempering challenge? Drop your specific questions in the comments below, and let's troubleshoot together. Don't forget to tag your glossy creations with #TemperingMasterclass on social media.
Download Free Temperature Chart Explore Bonbon Recipes🏷️ Article Tags:
Tempering Chocolate Chocolate Tempering Methods Seeding Method Couverture Chocolate Chocolate Crystallization Fat Bloom Fix Tempering Chocolate Temperatures
References: Ecole Chocolat Tempering Guide | Callebaut Professional Tips