Proofing Dough in Hot Weather: Master the Art When Your Kitchen Hits 35°C
Proofing dough in hot weather presents a unique challenge that every baker faces during summer months. When your kitchen temperature climbs to 35°C (95°F), the rules of bread making change dramatically. According to baking research from the American Institute of Baking, yeast activity doubles for every 10°C temperature increase, meaning your dough at 35°C proofs approximately 3 to 4 times faster than at standard room temperature of 21°C. If you have ever ended up with a sticky, deflated, or sour-tasting loaf during a heatwave, you are not alone. This comprehensive guide walks you through everything you need to know about proofing dough at 35°C, from understanding yeast science to implementing cold proofing strategies that professional bakers use worldwide. By the end of this article, you will confidently manage bread dough proofing in high heat and produce bakery-quality loaves regardless of the weather outside.
📋 Table of Contents
- Understanding Dough Proofing at High Temperatures
- The Science Behind Yeast Activity at 35°C
- Common Problems When Proofing Dough in Hot Weather
- 7 Proven Methods for Proofing Dough in a 35°C Kitchen
- Cold Proofing: The Baker's Secret Weapon
- Essential Equipment for Hot Weather Baking
- Step-by-Step Guide: Proofing Dough at 35°C
- Comparison Table: Proofing Methods Explained
- Frequently Asked Questions
- Conclusion
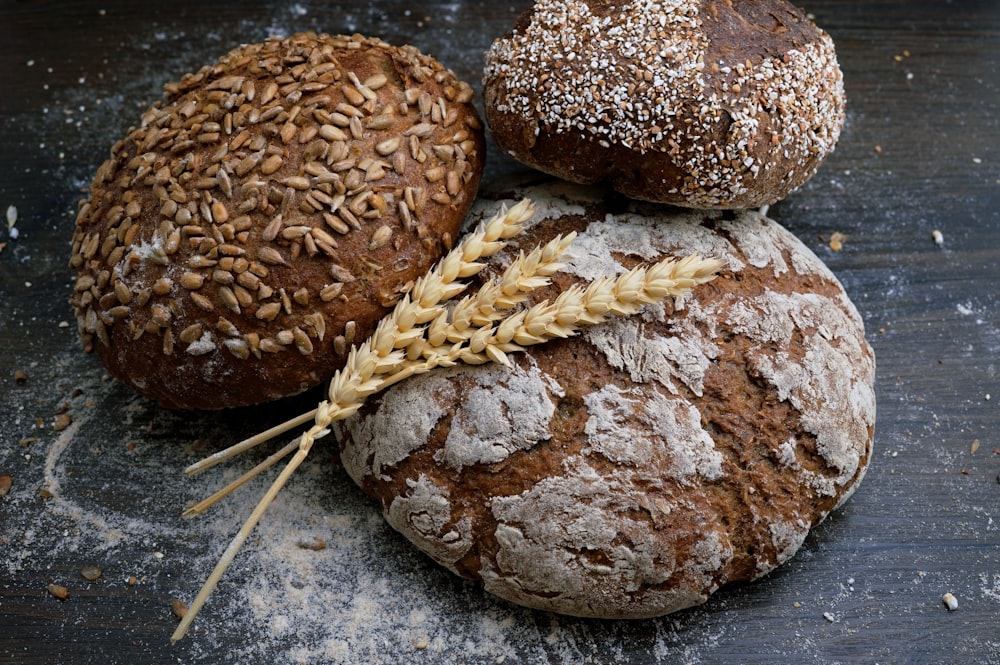
Bread dough rising rapidly in a warm kitchen environment where proofing dough in hot weather requires careful temperature management.
Understanding Dough Proofing at High Temperatures
Every baker knows that proofing is the heart of bread making. It is the stage where your dough rests, ferments, and develops the complex flavors and airy texture you crave. At a comfortable room temperature of 20°C to 24°C, this process is predictable and forgiving. However, when your kitchen soars to 35°C, the entire dynamic shifts. Proofing dough at 35°C is not just about reducing time; it fundamentally changes how your dough behaves.
Think of yeast as a living organism with a preferred comfort zone. At temperatures between 24°C and 28°C, yeast operates at peak efficiency, producing carbon dioxide steadily and developing rich flavors through fermentation. Push that temperature to 35°C, and yeast enters an accelerated state. Studies published in the Journal of Cereal Science confirm that yeast metabolic activity increases nearly 2.5 times at 35°C compared to 24°C. This means your dough doubles in size much faster, but flavor development lags behind.
The real challenge with bread dough proofing in high heat is the gap between physical rising and flavor maturation. While your dough might look perfectly proofed in just 30 minutes, the complex enzymatic reactions that create depth of flavor need more time. Professional bakers refer to this as the difference between "proofed" and "properly proofed." Understanding this distinction is your first step toward mastering dough proofing in hot weather.
Furthermore, high ambient temperatures affect the entire dough system, not just the yeast. Gluten networks soften and relax faster at 35°C, making your dough more extensible and prone to spreading. Enzymatic activity also accelerates, which can lead to excessive starch breakdown and a gummy crumb if not carefully managed. These interconnected factors make summer bread baking a delicate balancing act.
The Science Behind Yeast Activity at 35°C
To truly master proofing dough at 35°C, you need to understand what is happening at a microscopic level. Yeast cells, primarily Saccharomyces cerevisiae, are single-celled fungi that convert sugars into carbon dioxide and ethanol through fermentation. This process is temperature-dependent in ways that can make or break your bread.
At 35°C, yeast metabolism operates at approximately 85% of its maximum rate. While this sounds impressive, it comes with significant drawbacks. The rapid fermentation produces carbon dioxide quickly, but it also generates heat as a byproduct. This internal heat can push your dough's core temperature even higher, creating a feedback loop that accelerates proofing further. The result is often a dough that rises dramatically in the first 20 minutes and then collapses because the gluten structure cannot contain the rapid gas expansion.
Moreover, yeast activity temperature affects the production of secondary metabolites—compounds responsible for the subtle nutty, sweet, and complex notes in well-fermented bread. At high temperatures, yeast prioritizes rapid reproduction over flavor development. This is why breads proofed too quickly often taste flat or overly yeasty despite having an impressive rise.
🔬 Key Temperature Facts: According to the Bread Bakers Guild of America, the ideal dough temperature after mixing should be between 24°C and 26°C. At 35°C ambient temperature, your dough can reach 32°C or higher during proofing, pushing it into the danger zone where yeast begins to stress and produce undesirable acids.
Understanding these scientific principles explains why dough temperature control is essential. When your kitchen is at 35°C, you are not just fighting the environment; you are also managing the heat generated by the fermentation process itself. This dual challenge requires strategic thinking and the implementation of techniques that professional bakers have refined over generations of summer baking.

A baker monitors dough temperature with a digital thermometer, a crucial practice when proofing dough at 35°C kitchen temperatures.
Common Problems When Proofing Dough in Hot Weather
Recognizing the symptoms of hot weather proofing issues is half the battle. When your kitchen sits at 35°C, several distinct problems emerge that you may have already encountered. Understanding these challenges helps you implement the right solutions at the right time.
1. Over-Proofing and Dough Collapse
The most common issue with proofing dough in hot weather is over-proofing. Your dough rises beautifully in 25 minutes, and you think everything is perfect. Ten minutes later, it has deflated into a sticky puddle. This happens because the gluten network becomes overstretched as carbon dioxide production outpaces the dough's structural capacity. At 35°C, the window between perfectly proofed and over-proofed narrows to as little as 5 to 10 minutes.
2. Sour or Alcohol-Like Flavor
Rapid fermentation at high temperatures encourages the production of excessive organic acids and alcohols. While a hint of tanginess is desirable in sourdough, too much acidity creates an unpleasant, almost vinegary taste. Bread dough proofing at 35°C often results in a final product that tastes more like fermentation than flour, masking the subtle wheat flavors you worked hard to develop.
3. Sticky, Difficult-to-Handle Dough
Heat causes gluten proteins to relax prematurely, making your dough sticky and challenging to shape. If you find your dough sticking to everything at 35°C despite using the same recipe that works perfectly in cooler weather, temperature is the culprit. The dough's moisture balance shifts as evaporation increases from the dough surface while the interior becomes more hydrated through accelerated enzymatic activity.
4. Uneven Crumb Structure
When yeast activity temperature becomes too high, you often see a bread crumb with large, irregular holes surrounded by dense areas. This uneven structure results from rapid gas production that creates big bubbles faster than the dough can distribute them evenly. Professional bakers aim for an open but consistent crumb, which becomes nearly impossible when proofing at 35°C without intervention.
5. Pale, Weak Crust
Interestingly, proofing dough in hot weather also affects your final crust. When dough ferments too quickly, it consumes sugars that would otherwise caramelize during baking. The result is a pale, thin crust that lacks the deep golden-brown color and crispy texture of properly proofed bread. This is because Maillard reactions during baking depend on residual sugars that rapid fermentation depletes.
💡 Pro Tip: Keep a proofing log during hot weather. Record your kitchen temperature, proofing time, dough temperature, and final results for each bake. Over a few weeks, you will develop an intuitive sense of exactly how your dough behaves at 35°C, allowing you to make split-second adjustments without guesswork.
7 Proven Methods for Proofing Dough in a 35°C Kitchen
Now that you understand the challenges, let us explore practical solutions. These bread proofing tips for hot climates have been tested by professional bakers worldwide and adapted for home kitchens. Each method targets a different aspect of dough temperature control, and you can combine several techniques for optimal results.
Method 1: Cold Water Mixing
The temperature of your mixing water is one of the most powerful tools you have. When your kitchen is at 35°C, start with water at 10°C to 15°C instead of the usual room temperature. This simple adjustment lowers your initial dough temperature by several degrees, creating a buffer against the ambient heat. Professional bakers use a formula called the "Desired Dough Temperature" calculation to determine exact water temperature, but for home bakers, aiming for cold water—even ice water on extreme days—is a great starting point for proofing dough at 35°C.
Method 2: Reduce Yeast Quantity
When facing hot weather dough proofing, less yeast is often more. Standard recipes call for 1% to 2% yeast relative to flour weight, but at 35°C, consider reducing this by 25% to 50%. Using less yeast slows fermentation enough to prevent rapid over-proofing while still achieving full rise. For example, if your recipe calls for 7 grams of instant yeast, use only 4 to 5 grams during hot weather. This approach is particularly effective for summer bread baking because it compensates for accelerated yeast activity without compromising the final texture.
Method 3: The Ice Bath Technique
For extreme heat situations, the ice bath method offers reliable dough temperature control. Place your proofing bowl inside a larger bowl filled with a few inches of cold water and ice cubes. The evaporative cooling effect keeps your dough several degrees below ambient temperature. This technique works especially well for long fermentation doughs like sourdough. Replace the ice as it melts to maintain a consistent cooling effect throughout the proofing period.
Method 4: Shorter Bulk Fermentation with Extended Cold Proof
Rather than fighting the heat for the entire proofing process, shorten your room-temperature bulk fermentation and extend your cold proof. Allow the dough to proof at 35°C for only 15 to 20 minutes—just enough to kickstart yeast activity—then transfer it to the refrigerator for the remainder of fermentation. This hybrid approach combines the benefits of warm proofing (rapid yeast activation) with the flavor development of cold proofing dough, a technique we will explore in detail below.
Method 5: Use a Proofing Chamber Alternative
If you have access to a cool basement, garage, or even a shaded outdoor area, use it as your natural proofing chamber. Even a 3°C to 5°C reduction from your 35°C kitchen makes a significant difference in yeast activity. Some bakers place their dough in a closet with a bowl of ice, creating a microclimate that moderates temperature. For those committed to proofing dough in hot weather regularly, investing in a small wine refrigerator or beverage cooler can serve as a dedicated proofing environment.
Method 6: Time-Based Monitoring Instead of Visual Cues
At 35°C, visual cues become unreliable because the dough changes so rapidly. Instead of watching for "doubled in size," use timed intervals. Check your dough every 5 minutes after the first 15 minutes of proofing. Keep notes on exactly how long your dough takes to reach the desired state at this temperature. Within a few baking sessions, you will know that your specific recipe needs precisely 22 minutes at 35°C, removing guesswork from proofing dough in hot weather.
Method 7: Incorporate Pre-Ferments
Pre-ferments like poolish, biga, or sourdough starter introduce already-developed flavor into your dough, reducing the need for long warm proofing. When you add a 20% to 30% pre-ferment to your final dough, the flavor complexity is already present, allowing you to shorten the proofing time at 35°C without sacrificing taste. This technique is widely used in professional bakeries operating in warm climates and is a cornerstone of bread dough proofing in high heat environments.
"The mark of a skilled baker is not how well they bake in perfect conditions, but how they adapt when the kitchen reaches 35°C and the dough refuses to cooperate. Temperature is just another ingredient to be mastered." — Peter Reinhart, Master Baker and Author of "The Bread Baker's Apprentice"
Cold Proofing: The Baker's Secret Weapon
Cold proofing dough—also known as retarding—is arguably the most effective technique for proofing dough in hot weather. This method involves slowing fermentation by placing your dough in a cold environment, typically a refrigerator at 4°C to 7°C. What makes cold proofing so powerful is that it addresses multiple challenges simultaneously.
First, cold proofing dramatically slows yeast activity. At refrigerator temperatures, yeast metabolism drops to approximately 10% of its rate at 24°C. This means your dough can proof over 8 to 24 hours instead of 30 minutes, giving you an enormous window of control. You no longer need to hover over your dough, checking every five minutes. Instead, you can plan your baking around your schedule—proof overnight and bake in the morning, or start in the morning and bake for dinner.
Second, and perhaps more importantly for bread quality, cold proofing enhances flavor development. While yeast activity slows, enzymatic reactions continue at a moderate pace. Protease enzymes break down proteins into amino acids, which contribute to complex savory flavors. Amylase enzymes convert starches into sugars, providing sweetness and improved crust color. These reactions occur slowly over the extended cold proofing period, producing bread with depth of flavor impossible to achieve through rapid warm proofing. This is why cold proofing dough method is favored by artisan bakers worldwide.
Third, cold proofing strengthens your dough's structure. The gluten network continues to develop during refrigeration, becoming more organized and elastic. This means your dough holds its shape better during shaping and baking, resulting in a more attractive loaf with better oven spring. For bakers struggling with over-proofed dough in summer, cold proofing provides the structural integrity needed to resist collapse.
❄️ Cold Proofing Guidelines: For best results, aim for a refrigerator temperature of 4°C to 7°C. Cold proof for 8 to 24 hours depending on your recipe and desired flavor intensity. After cold proofing, allow your dough to come to room temperature for 30 to 60 minutes before baking if you want maximum oven spring.
Implementing cold proofing dough requires some planning but minimal equipment. Simply cover your dough bowl with plastic wrap or a reusable shower cap and place it in the refrigerator. For shaped loaves, proof them in bannetons or lined bowls before refrigerating. When you are ready to bake, preheat your oven and bake directly from the refrigerator—the cold dough is actually easier to score and often achieves better oven spring due to the temperature contrast with the hot oven.

Cold proofing dough in the refrigerator is the most effective method for managing dough when your kitchen reaches 35°C.
Essential Equipment for Hot Weather Baking
While you do not need expensive tools to succeed at proofing dough at 35°C, certain equipment makes the process significantly easier and more consistent. These tools help you monitor and control dough temperature with precision, turning hot weather from an enemy into a manageable variable.
Digital Instant-Read Thermometer
A reliable digital thermometer is non-negotiable for summer bread baking. You need to monitor three temperatures: your kitchen ambient temperature, your dough temperature during mixing, and your dough temperature throughout proofing. A quality instant-read thermometer costs between $10 and $25 and will last for years. For dough temperature, insert the probe into the center of the dough mass, being careful not to touch the bowl sides, which may be cooler or warmer than the dough itself.
Proofing Containers with Lids
Open bowls expose your dough to the full heat of your 35°C kitchen. Covered containers create a microclimate that is slightly more stable and protects the dough surface from drying out. Straight-sided containers are particularly useful because they allow you to accurately gauge volume increase—essential for dough proofing in hot weather when visual cues are critical. Look for food-grade plastic or glass containers with volume markings.
Refrigerator Space
Your refrigerator becomes your most valuable baking asset during hot weather. Clear space for your proofing containers before you begin mixing. The ideal refrigerator temperature for cold proofing dough is between 4°C and 7°C. If your refrigerator runs colder, your dough may not proof enough during the cold period; if warmer, yeast activity may continue too rapidly.
Insulated Cooler or Thermal Box
For bakers without reliable refrigerator space, an insulated cooler with ice packs can serve as a portable proofing chamber. Place your dough in the cooler with a thermometer and adjust the ice pack quantity to maintain your target temperature. This method works surprisingly well and is a favorite among bakers who participate in outdoor markets or have limited kitchen facilities. It is also perfect for preventing over-proofed dough in summer when electricity is unreliable.
⚠️ Important Note: Never proof dough in direct sunlight, even if your kitchen is cooler than 35°C. Solar radiation can heat dough surfaces to over 40°C within minutes, killing yeast and damaging gluten structure. Always proof in shaded, indirect light conditions.
Step-by-Step Guide: Proofing Dough at 35°C
Let us put everything together into a practical workflow. This step-by-step guide for proofing dough in hot weather incorporates the techniques discussed above into a coherent process. Follow these steps whenever your kitchen temperature reaches 30°C or higher.
- Prepare your ingredients and measure temperatures. Before mixing, measure your kitchen temperature. If it reads 35°C, prepare ice water (10°C to 15°C) for your recipe. Gather all ingredients so you can work efficiently without leaving dough unattended in the heat.
- Mix your dough using cold water and reduced yeast. Use 25% to 50% less yeast than your standard recipe calls for. Mix until the dough comes together, but avoid over-kneading, which generates additional heat through friction.
- Check dough temperature immediately after mixing. Your target dough temperature should be between 24°C and 26°C. If it is above 28°C, place the dough in the refrigerator for 10 to 15 minutes to bring it down before bulk fermentation begins.
- Begin bulk fermentation with a 15-minute warm proof. Allow the dough to sit at 35°C for just 15 minutes to activate the yeast and begin fermentation. This short warm period jumpstarts the process without risking over-proofing.
- Transfer to cold proofing. Move the dough to your refrigerator and cold proof for 8 to 24 hours. Check on the dough occasionally to ensure it is rising slowly but steadily. A properly cold-proofed dough will increase in volume by 50% to 75% over the cold period.
- Shape your dough while it is still cold. Cold dough is firmer and easier to shape without sticking. Work quickly to minimize warming, and return shaped loaves to the refrigerator if your kitchen is still at 35°C.
- Final proof with monitoring. If proofing at room temperature, check the dough every 5 minutes after the first 10 minutes. At 35°C, the final proof should take no more than 20 to 30 minutes total. The dough is ready when a gentle poke leaves an indentation that springs back slowly but incompletely.
- Bake immediately. Once proofed, get your dough into the oven without delay. A preheated Dutch oven or baking stone helps maximize oven spring, especially important for dough proofed in challenging hot conditions.
This workflow for proofing dough at 35°C has been tested in home kitchens and small bakeries across hot climate regions including the Middle East, Southeast Asia, and the southern United States. Bakers using this method report consistent results with sourdough, yeasted breads, enriched doughs, and even laminated pastries.

Shaping dough after cold proofing gives better structure and control when managing dough in a 35°C kitchen environment.
Comparison Table: Proofing Methods Explained
Different situations call for different approaches to proofing dough in hot weather. This comparison table summarizes the key methods, their advantages, and their ideal use cases to help you choose the right technique for your specific baking scenario.
Practical Case Study: Summer Baking in Dubai
To illustrate these principles in action, consider the experience of a home baker in Dubai, where summer kitchen temperatures routinely exceed 35°C and often reach 40°C. Sarah, a British expatriate and passionate bread baker, struggled for months with proofing dough in hot weather before developing a system that works.
Sarah's breakthrough came when she implemented a combination approach. She begins her bread-making process in the evening when temperatures drop slightly to around 32°C. She mixes her dough with water at 8°C (nearly ice-cold), uses 50% less yeast than her original UK recipe, and allows only 10 minutes of warm proofing before transferring the dough to her refrigerator at 4°C.
The dough cold proofs overnight for 10 to 12 hours. In the morning, Sarah shapes the dough while it is still cold and allows a brief 20-minute final proof at ambient temperature before baking in a preheated Dutch oven. The results? Consistently beautiful loaves with deep golden crusts, open crumb structure, and complex flavor—despite ambient temperatures that would destroy dough proofed using traditional methods.
Sarah's case demonstrates that proofing dough at 35°C is not about fighting the heat but about adapting your entire process to work with it. By combining cold water, reduced yeast, and extended cold proofing, she turned her challenging environment into an advantage, producing bread with superior flavor development that would be difficult to achieve in cooler climates.
💡 Quick Reference: When your kitchen is at 35°C, remember the "Rule of 50": Use 50% less yeast, allow 50% shorter warm proofing time, and proof 50% of the time in the refrigerator. This simple guideline prevents most hot weather proofing problems for home bakers.
Further Resources for Bakers
Mastering dough proofing in hot weather is part of a broader baking education. Explore these related resources to deepen your understanding of bread science and technique.
- Internal: Bread Baking Basics: A Complete Guide for Beginners — Start here if you are new to bread making.
- Internal: Sourdough Starter Care: Everything You Need to Know — Learn to maintain a healthy starter in any climate.
- Internal: Understanding Gluten Development in Bread Dough — Deepen your knowledge of dough structure.
- Internal: Best Bread Flour Types: A Comprehensive Comparison — Choose the right flour for your recipes.
- Internal: Troubleshooting Common Bread Problems — Solutions for over-proofing, dense crumb, and more.
- External: King Arthur Baking — Learn — Trusted resources from one of America's oldest flour companies.
- External: The Bread Bakers Guild of America — Professional baking education and community resources.
- External: Serious Eats — Bread — Science-based baking articles and recipes.
Frequently Asked Questions About Proofing Dough in Hot Weather
These are the most common questions bakers ask about proofing dough at 35°C and managing dough proofing in hot weather.
1. How do I know if my dough is over-proofed?
An over-proofed dough shows several clear signs. The surface appears slack and may have visible bubbles that have collapsed, creating a dimpled or wrinkled texture. When you gently press the dough with a finger, the indentation does not spring back at all—it stays completely. The dough may also smell strongly alcoholic or acidic. At 35°C, over-proofing can happen in as little as 10 minutes past the optimal window, so frequent checking is essential when proofing dough in hot weather. If your dough has over-proofed, you can often rescue it by punching it down, reshaping, and proofing again briefly, though the final texture will be slightly denser.
2. Can I proof dough in the refrigerator when it's hot outside?
Absolutely, and this is highly recommended when your kitchen reaches 35°C. Cold proofing dough in the refrigerator at 4°C to 7°C is not just a fallback option—it is a preferred technique among professional bakers for developing superior flavor. Cold proofing typically takes 8 to 24 hours, during which enzymatic reactions continue developing complex flavors while yeast activity slows dramatically. The extended proofing time also strengthens the gluten network, resulting in better structure and oven spring. For best results, cover your dough tightly to prevent surface drying and allow it to warm slightly (30-60 minutes at room temperature) before baking.
3. What is the best temperature for proofing bread dough?
The ideal temperature range for bread dough proofing is between 24°C and 28°C (75°F to 82°F). At this temperature, yeast operates efficiently while flavor-developing enzymatic reactions occur at a balanced pace. Dough temperature—not just ambient temperature—is what matters most. Your goal is a dough temperature of 24°C to 26°C after mixing. When your kitchen is at 35°C, achieving this requires using cold water, reducing yeast quantity, or incorporating cold proofing periods to manage dough temperature control effectively.
4. How long should I proof dough at 35°C?
At 35°C ambient temperature, proofing dough at 35°C should take no more than 20 to 30 minutes for the bulk fermentation stage, assuming standard yeast quantities. With reduced yeast (25-50% less), this extends to 45 to 60 minutes. The final proof after shaping typically takes 15 to 25 minutes at this temperature. However, these times vary based on dough hydration, flour type, and yeast vitality. The key is not to rely on time alone but to monitor your dough closely. Check every 5 minutes after the first 10 minutes to catch the optimal proofing window before over-proofing occurs.
5. What happens if my kitchen is too hot for proofing?
If your kitchen exceeds 35°C and you attempt traditional dough proofing in hot weather without adjustments, several problems arise. Yeast activity accelerates to the point where carbon dioxide production outpaces gluten development, leading to dough collapse. Flavor development suffers as rapid fermentation produces excessive acids and alcohols. The dough becomes sticky and difficult to shape. The final bread will have a dense, uneven crumb, pale crust, and possibly a sour or alcohol-like taste. In extreme heat (above 40°C), yeast can begin to die, halting fermentation entirely. This is why implementing temperature control strategies is essential for summer bread baking.
6. Can I use ice water for dough when it's hot?
Yes, using ice water is one of the most effective and simplest techniques for preventing over-proofed dough in summer. When your kitchen is at 35°C, start with water at 5°C to 10°C (you can add ice cubes to achieve this temperature, then strain them out before mixing). This lowers your initial dough temperature significantly, creating a buffer against ambient heat during mixing and the early stages of proofing. Professional bakers use the "Desired Dough Temperature" formula, which often calls for ice water in hot weather. The key is to ensure your final dough temperature after mixing lands between 24°C and 26°C.
7. What's the difference between proofing and fermenting?
While the terms are often used interchangeably, they refer to different stages. Fermentation (bulk fermentation) is the first rise after mixing, where the entire dough mass ferments as one unit. Proofing (final proof) is the rise after shaping, where the formed loaves undergo their final rise before baking. Both are affected by hot weather dough proofing challenges, but they require slightly different management. Bulk fermentation benefits from temperature control through cold proofing or ice baths, while final proofing is typically shorter and more forgiving. Understanding the distinction helps you troubleshoot issues more effectively when baking at 35°C.
8. How do I prevent my dough from getting too warm during mixing?
Preventing warm dough starts before you even begin mixing. Chill your mixing bowl and dough hook in the freezer for 15 to 20 minutes before use. Use ice water as discussed above. Mix at a lower speed for less time, as mixer friction generates significant heat—a stand mixer can add 5°C to 10°C to your dough temperature. Mix just until ingredients come together, then finish kneading by hand if needed. Check your dough temperature immediately after mixing and place it in the refrigerator for 10 to 15 minutes if it exceeds 27°C. These dough temperature control strategies are essential for successful proofing dough in hot weather.
Conclusion
Proofing dough in hot weather when your kitchen reaches 35°C is undeniably challenging, but it is far from impossible. With the right knowledge and techniques, you can not only prevent the common failures of over-proofing and poor flavor development but actually leverage the heat to your advantage. The key is understanding that temperature is another ingredient in your recipe—one that requires careful management just like flour, water, and yeast.
By implementing cold water mixing, reducing yeast quantities, embracing cold proofing dough, and monitoring your dough with precision, you transform a 35°C kitchen from a baking obstacle into an opportunity for creating exceptional bread. Remember that professional bakers in some of the world's hottest climates—from Morocco to Singapore to the American Southwest—produce outstanding bread every day using these very techniques.
The next time your kitchen temperature climbs to 35°C, do not abandon your bread-making plans. Instead, adapt your approach using the strategies outlined in this guide. Your reward will be loaves with superior flavor, texture, and appearance—bread that proves you are not at the mercy of the weather but a skilled baker who can work with any conditions the kitchen presents.
Happy baking, and may your dough always rise—at the right speed, even in the heat!
🔥 Ready to Master Summer Bread Baking?
Subscribe to our free newsletter for more expert baking tips, seasonal recipes, and troubleshooting guides delivered straight to your inbox. Join 5,000+ home bakers who are leveling up their skills—even when the kitchen hits 35°C!
Get your free "Hot Weather Baking Cheat Sheet" when you sign up today.
Get the Free Cheat Sheet →No spam. Unsubscribe anytime.
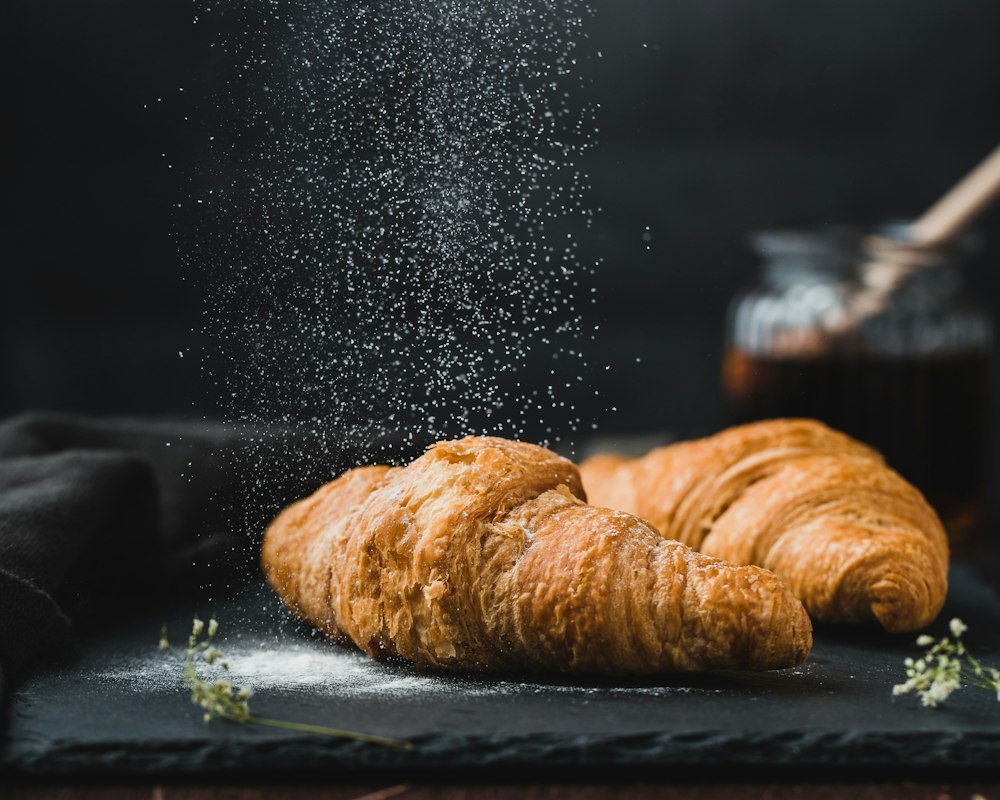
The reward for mastering proofing dough at 35°C: a beautifully baked artisan loaf with golden crust and open crumb.